OH CHRISTMAS TREE
With Christmas just a week away, I thought I would share with you one of my decorating projects. Less than two weeks ago I bought and decorated the tree at my parent's home. I have to admit I am a huge fan of color so when my mom asked for a black and white tree, I was a little blah about it but also excited about the challenge. I remembered seeing the Alexander McQueen Fall Collection which happened to be black and white with it's pearl face cages, pearl beaded dresses and accessories. The small Catholicism inspired collection also featured white feathers and metallics like gold and silver. I decided to use the collection as my inspiration in both the literal and non-literal sense. I loved the idea of faux pearls on the tree. I found some polka-dot ribbon. My mom found pearl and polka-dot bulbs online. The polka-dots gave the same effect as the pearls in the collection. I selected silver as my metallic and incorporated feathers using bird ornaments I found in store and online. I used other patterns like the bird cage criss-cross on the tree to remind you of the face cages and criss-cross patterns in McQueen's collection. I also added one of my favorite things that is also on trend in fashion this year, animal prints.
 |
| c/o style.com |
CHRISTMAS TREE FASHION
 |
| glass swan from Pier 1 |
 |
| silver glitter bird from Big Lots |
DIY!!!
HOW TO MAKE YOUR OWN BOW TREE TOPPER!!!
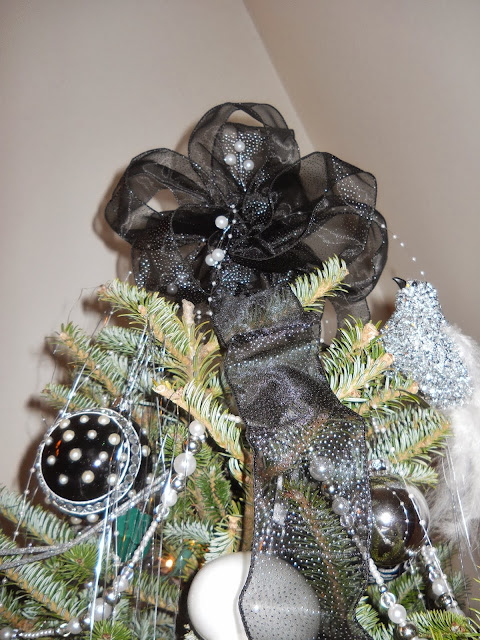
I usually buy a star or some kind of decorative tree topper but this year I had the hardest time finding what I wanted. I envisioned a pearl star but once I found one similar to my ideal piece, It was not the price I had hoped for. I decided to create a bow out of polka-dot ribbon and add pearls to it. Check out the steps to my handmade bow.
What you will need
1. one spool of 6 to 8 ft ribbon
2. thread
3. needle
4. glue gun
5. beaded plastic strands or beads on wire (optional) Find these in the wedding department of craft stores
5. beaded plastic strands or beads on wire (optional) Find these in the wedding department of craft stores
(you can use a glue gun instead of needle and thread)
Hold the loop firm as you continue creating loops with the loose ribbon on the spool. Continue this process until the bow is as full as desired while maintaining the loop ends in your hand.
2. Use the needle and thread to sew the loops together where your hand is holding the fullness. Leave space under your hand at the bottom. This will create a sleeve to slide the bow on top of the tree if done correctly.
If you are using the glue gun instead of sewing, glue the folds to one another one by one using dots the size of chocolate chips. Be careful not to burn yourself.
3. Add light weight beading. Squeeze small amounts of glue deep into the folds of the bow and tuck the beaded strands into the glue. Press together slightly to conceal the glue.
I also added pearls inside the sleeve so that pearls would cascade down the tree. If you do this you have to spread the pearl strands out evenly around the tree.
HAPPY HOLIDAYS!!!
Kris,


No comments:
Post a Comment